


Cast Plaster Panels on a Ceiling — Installation Guide
We get asked about ceiling installation fairly regularly, particularly from customers fitting our cast plaster panels in hallways, bathrooms, and open-plan living spaces where they want the panelling to carry across the ceiling as well as the walls.
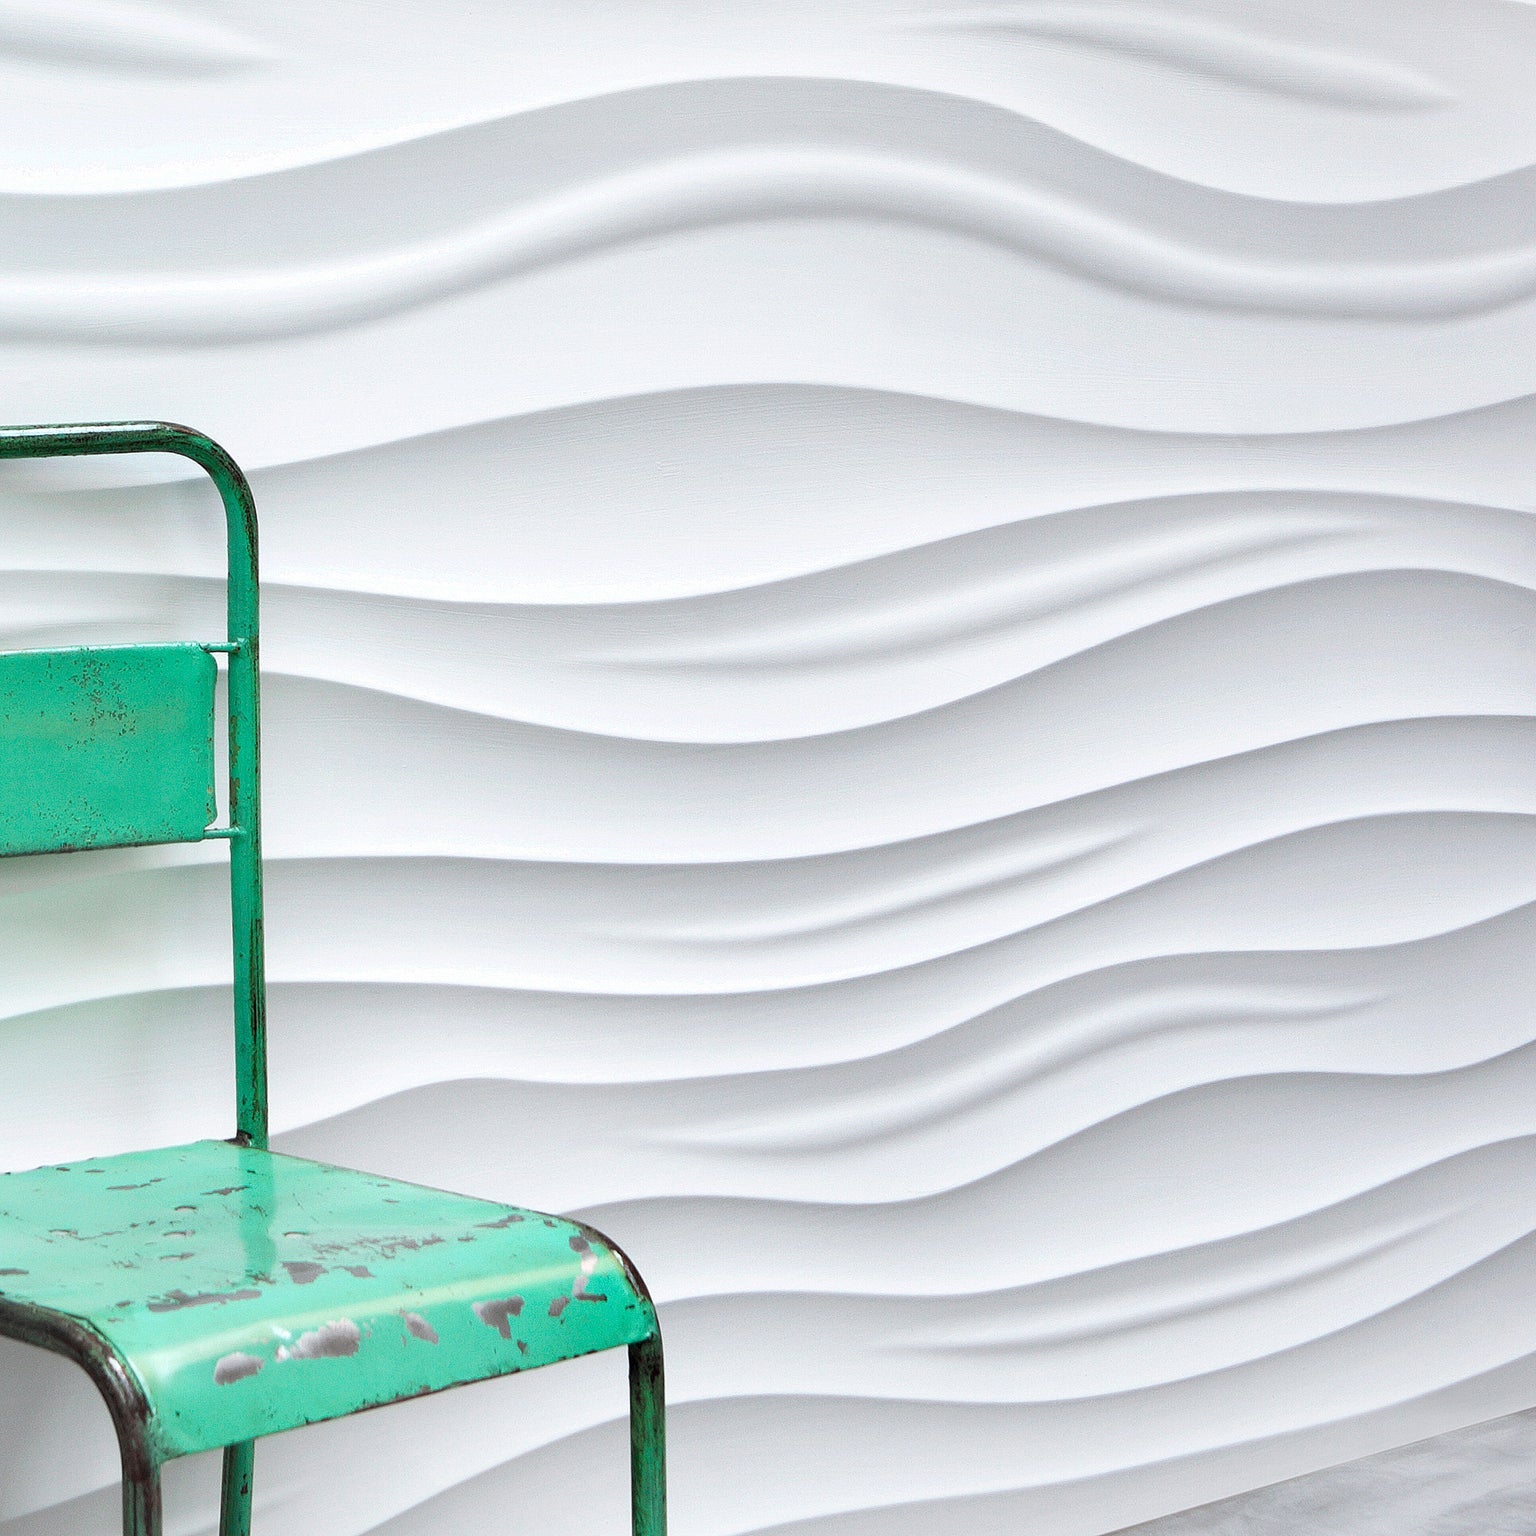
The short answer is yes, it can be done. But cast plaster is a heavy material — our panels are 60 x 60cm and weigh around 6kg each — and that changes everything about how they need to be fixed overhead.
Why adhesive alone isn't safe on a ceiling
On a vertical wall, gravity works with you. The panel rests against the surface and the adhesive holds it flat. On a ceiling, gravity is working against you constantly, and any adhesive bond — no matter how strong it feels when first applied — is under continuous downward stress.
Standard grab adhesives are not rated for sustained overhead load on heavy materials. Over time, through temperature changes and normal building movement, an adhesive-only fix on a 6kg panel is a genuine safety risk. We wouldn't recommend it, and we wouldn't want a customer to find out the hard way.
Mechanical fixings are essential. Adhesive is a supplement, not the solution.
The correct method, step by step
-
Find your joists before you do anything else
Use a joist finder across the full ceiling area where you're fitting panels. Mark the joist positions clearly. Every mechanical fixing needs to go into a joist — not into plasterboard alone, which won't hold the weight safely over time.
-
Install a batten framework if your layout requires it
In most rooms, the joist positions won't perfectly match your panel grid. The solution is to fit timber battens across the ceiling first, screwed into the joists at regular intervals. Your panels then fix to the battens rather than directly to joists. This gives you a solid fixing point wherever you need it and is the most reliable method for a full ceiling installation.
-
Pre-drill pilot holes in every panel
Cast plaster will crack under direct screw pressure without a pilot hole. Drill slightly oversized pilot holes at each fixing point before you put anything near the ceiling. This also allows for minor movement — plaster is less forgiving than foam or MDF and needs a small amount of tolerance in the fixing.
-
Fix with countersunk screws into the battens or joists
Use a minimum of 60–70mm screws, countersunk so the heads sit below the panel surface. Aim for at least four fixing points per panel — one near each corner. Don't overtighten; snug is enough, and plaster can crack if you bear down too hard.
-
Apply CT1 polymer adhesive as a secondary measure
Once the mechanical fixings are in, apply CT1 along the back edge of each panel and into any gaps between panels and ceiling. CT1 is a polymer sealant and adhesive — it bonds well to plaster, remains flexible after curing, and won't crack or fail over time the way standard grab adhesives can. It's the right product for this application. This step is about long-term stability and finish, not structural support — the screws are doing that work.
-
Fill, sand and decorate
Fill countersunk screw holes and panel joints with Gyprock Easyfill. It sets hard, sands back cleanly, and gives a much crisper finish than standard multi-purpose filler — particularly useful on the joints between panels where you want a seamless result. Sand flush once dry, then paint as normal.
A note on working safely at height
Ceiling installation needs two people: one to hold and position the panel, one to fix. A ceiling prop or a piece of board temporarily propped against the panel gives you both hands free for the drill. Don't try to hold a 6kg panel overhead while drilling — it's awkward, tiring, and increases the chance of a damaged panel or a missed fixing.
Use proper scaffolding or a heavy-duty step platform at the right height. Ladders aren't ideal for this kind of work — you need to be stable with both hands free.
Is this a job for a DIYer?
It depends on the person. If you're confident with a drill, you understand your ceiling structure, and you've fitted ceiling fixtures or boards before, this is manageable — particularly once your batten framework is in place, which makes the panel fixing fairly straightforward.
If you're less experienced with overhead work, or if you're not sure what's above your plasterboard, it's worth getting a joiner to install the batten framework. That's the structural part of the job. Once the battens are in, fitting the panels themselves is more accessible.
We'd always rather a customer asks before they order than discovers a problem halfway through a job. If you're planning a ceiling installation and want to talk it through, give us a call on 01535 642560 or drop an email to [email protected]. We're based in Yorkshire and we know this product — we're happy to give honest advice on whether a job is straightforward or whether it needs a particular approach.
What about bathrooms and kitchens?
Our cast plaster panels are not moisture resistant in the way that PU foam or PVC panels are, so a ceiling directly above a shower enclosure or directly over a hob isn't suitable. A bathroom ceiling away from direct water spray is generally fine — the same rules apply for fixing. If you're unsure whether the location is appropriate, ask us and we'll be straight with you.
Other panels that work well on ceilings
If you want the look of a feature ceiling without the weight and complexity of cast plaster, our PU stone panels and MDF panels are significantly lighter and more forgiving on ceilings. PU foam in particular is around 1–2kg per panel and can be fixed with adhesive alone in most cases, making it a genuinely DIY-friendly option for ceiling use. Worth considering if you're doing a large area or working without a second pair of hands.
Browse the full range at 3dwallpanels.co.uk, or order samples from £4.99
Leave a comment